CLASSROOM CHEER
- Claire

- May 15, 2022
- 5 min read
Updated: Dec 5, 2022
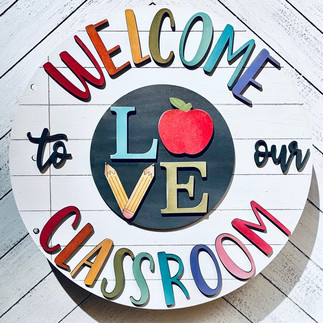
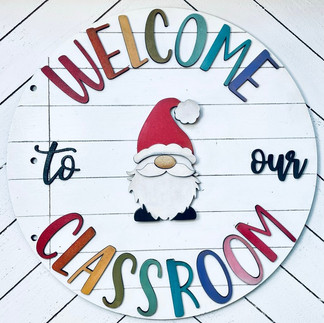
Create a warm welcome in your classroom or home school room with this beautiful welcome sign with interchangeable icons, to exchange for multiple reasons and seasons. Guaranteed to keep kids engaged and inspired! Makes for a wonderful teacher appreciation gift. Get a couple of kids or parents together to help paint this sign for your favorite teachers.

Your DIY Art kit will contain:
1 round base (either 10.5" with engraved lines or 15" solid pine)
raised 3D wood text
2 or more 3D icons from these choices
self-adhesive magnets
paints
1 reusable sponge brush
sponge wedges
1 inch nail
1 stand for10.5" rounds - for the 15" solid wood rounds, you will need to buy a more sturdy frame stand


Glue is not generally included, because it dries out too fast in small quantities. Please use one of the following glues, which I have found to work really well:
Aleene's Turbo Tacky Glue
Aleene's Tacky Glue
Elmer's All-Purpose Glue
They are available at craft stores and many super markets.
I like these because they dry clear and fast. You can also use superglue, but avoid silicone, hot or wood glue.
From home you will need:
paper plates
paper roll
masking tape (optional)
Before you begin:
Take note of how your pieces fit together, before removing the tape that keeps them bound. You will have received them assembled in the correct order. No worries, if you already separated them all out- it just requires a little more puzzling!
1. Paint the base

Using the sponge brush, smooth white paint over the surface in even long strokes, without overloading the brush.
Dry.
Repeat if desired.
To enhance the engraved lines on the 10.5" option, use a nail to scrape the paint out of the grooves.
If you slip with the nail, just touch up the scratch with leftover paint.

2. Lettering
Before painting, attach all the letters onto the up-turned sticky side of the masking tape. This will allow them to stay in place while you paint them and will avoid you getting too much paint on your fingers.

You will literally need about a pea-size of paint to create the colors on this project. A little goes a really long way!
You can paint the letters all black, monotone or in any colors you choose.
Use a sponge wedge to dab paint onto the letters carefully, so that excess paint does not run into the spaces or over the edges. Less is more!
For rainbow colors, you can use the same wedge for all the warm colors and a different one for cool colors. This allows colors to blend into each other a little and give a more coherent rainbow effect.
Don't be shy to mix your own shades. Just a few of infinite possibilities:
red + yellow = orange
yellow + blue = green
red + blue = purple
red + white = pink
yellow + pink = apricot
white + black = grey
Depending on the quantity of each color you add, your shades will vary widely.
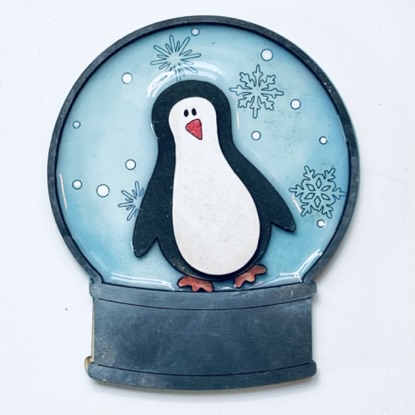
3. Interchangeable Icons
There are so many ways to paint these icons! Below are a few samples.
Color choices can be overwhelming, so pick a basic palette that appeals to you and add color splashes to it.

For large areas, use the sponge brush and for smaller areas, use the wedges.
Apply paint sparingly, using more than one coat where necessary.
Add a hint of white to colors for highlights or black for shading.
Do not be afraid to blend colors!
You can also use paint pens, crayons and markers to paint these pieces.
Dry fully.
Check out some icons in the slideshow below.


For more further painting techniques, with detailed video and photo content, please see this post.
4. Glue
Space out your fully dried letters on your board. For the 10.5" board, the letters will go almost right to the edge and spaced close to each other. With the larger 15" board they will be spaced further apart and about 1/2 - 3/4 inch from the edge.
Using a tiny amount of glue, attach all our letters to the board. If your glue comes out thick, warm it up in a jug of hot water to make it flow better, or use a sponge wedge to dab glue onto the backs of the letters.


The glue suggestions in the supply list above will all dry clear and fast. Still, use glue sparingly, to prevent it spreading out behind your carefully painted pieces.
Assemble the layers of your icons and allow to dry.
5. Magnets
* IMPORTANT: do not leave these magnets unattended around animals and children. They pose a severe health threat if swallowed. Once applied, the permanent adhesive will render them safe, as they will need considerable force and dexterity to be removed.
Before applying the magnets, please note that magnets have poles. Their directionality is important, otherwise they will not work.
See this instructional clip for applying magnets or read on:
Tips to applying magnets to the back of icons:
Attach 1 square magnet to the center of your base board by peeling away the sticker backing and pressing it into place.
place the single magnet, face down on top of the base magnet. This is very important. Play with directionality. One direction will click into place, whereas a 90 degree twist will counteract the magnetic field and your piece will not stick! Once you can feel the pull, you know you have the right orientation.
remove sticky backing.
place the icon on top of the sticky magnet, centered on the base. Press to transfer magnet to back of icon.
flip it over to check and press into place with our fingers. It should now be in the best place to allow your icon to be centered.

Magnet attached to the back of an irregularly shaped icon, will be easiest to center if you follow the above directions.

Raise the sign, and if you attached the magnets correctly, the icon will stay in place.
If the icon slips off, you will need to pry it off the icon and rotate it by exactly 90 degrees!

6. Stand
* included with 10.5" rounds
The stand comes in 2 pieces.
Slot them together. They fit snuggly enough not to require glue. The advantage to not gluing the stand is that you can dissemble it for storage when your sign is not in use.
If you paint the stand pieces they will fit VERY snuggly, so be careful not to overload your brush. Painted stands will likely not come apart after assembly, because the paint acts as an adhesive.


7. Optional: Varnish
Spray a clear varnish onto your base and icons, to protect them against little sticky fingers from your admirers and from tarnishing over time. A shiny gloss will be easier to keep clean than a matte version.
Products I have used and like are any Mod Podge brush or spray on products or Krylon Kamar varnish. Whichever one you choose, make sure it is 'non-yellowing', otherwise your perfectly painted white background will start to yellow over time.
8. Enjoy!
Display your adorable new sign with pride and enjoy as the kids you teach gather around in wonder and awe of your creative skills! This particular sign in my art classes, is always one that draws a lot of attention from little as well as fully-grown students! I wish you many decades of joy out of this craft.
More inspiration:


Thank you for joining me. I hope you enjoyed this art experience. I'd love to hear from you or see photos of your completed project. Feel free to email me if you have questions and share your art with tag @threeandme on social media.
Until next time,
Claire Houlding

#threeandme #woodsigns #classroom #DIYartkit #backtoschool #teacherappreciation #artclass #teachergift


Comments