Round Signs
- Claire

- Sep 27, 2020
- 4 min read
Updated: Mar 9, 2022
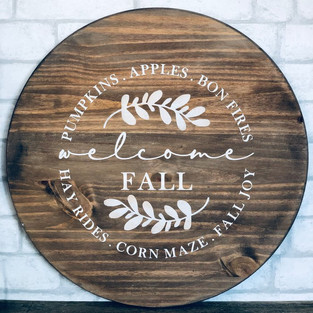
Eye-catching round signs are so versatile and can be adapted for all seasons and occasions. The sky is the limit when it comes to creating this classic home décor piece or thoughtful gift. This project is by far the most popular one at Three & Me, year after year, especially for parties and corporate events.

Order the art kit here or gather your own supplies and join me for an hour or two.
The stencil kit contains:
15" or 18" unfinished wood round (or smaller for kids events)
1 stencil from hundreds of custom choices (see here) or check under Three & Me seasonal workshops/ DIY Art Kits for newly created designs
re-usable sponge brush
sponge wedge for stenciling, or you can use a flat topped stencil brush
background paints
undiluted stencil paint
optional: wood cut elements, depending on the design you ordered
You will need:
paper plate
paper towels
masking tape (optional)
glue for some designs. I recommend Aleene's Turbo Tacky Glue.
Once you're ready, follow the techniques illustrated in clip below, or view written instructions. Due to the large range of designs and customizations offered, not each one can be demonstrated individually, but the video shows a more complex multicolor design, using techniques you'll be able to adapt for your sign.
Before we begin, I have a note for you on color choices:
There are so many colors, so where to begin?!
If you want to use many colors for the stencil, then paint your base in neutral colors. A white base, will allow you to use any color for stenciling. You really want to choose contrasting colors. For example red works well on white, but won't stand out on brown. White looks great on top of all dark base colors.
Black looks great on most light base colors.
A brown or black base will look best paired with white stencil work. If you want to supplement with color splashes, do so after painting a white first layer.
If you are unsure, paint a swatch of base color on the back of your round, and then dab splashes of color over it and see if they work well together.


1. PAINT WOOD:
Using a sponge brush, smooth your color onto the wood. For wood grain to show through, apply paint very sparingly and wipe with a paper towel. For solid finish, apply more than 1 coat, drying well between layers. You can use a hairdryer to speed along the drying process.

2. DRY:
Wood must be fully bone dry in order to stencil. In a rush, use a hairdryer.
3. STENCIL:
For more detailed photos of stencil techniques, see previous Three & Me Blog posts on stenciling projects or here.
rub both sides with a credit card/ craft stick.
remove GRID layer from the back of stencil.
keep the stencil lying face down, as you peel away diagonally from a corner, to prevent it clinging back on itself.
if any of the black letter pieces come away as you peel the grid layer, lay it back down and rub the section with a credit card. Try again.

position stencil sticky side down onto board.
carefully peel away the white film off the top of the stencil.
if any black pieces come away with the filmy layer, lay it back down and rub the section to transfer the stencil pieces back into place.

This first step is totally optional, but can really help if you are nervous about your design running: before painting any colors onto your stencil, brush a very thin layer of the base paint, that you painted the wood with, over it. Do not use a water for this step and make sure your brush is dabbed to remove excess liquid. Allow this base layer to dry. Then proceed with the next steps.
using the sponge wedge, blot on a super thin layer of paint. Do not overload the sponge, or it will run! Do not dilute with water.
Dry. Repeat 2-3 times until desired coverage.

Once dried, remove the stencil using a pin/ nail or weeding tool to help remove smaller parts of the stencil.
4. WOOD ELEMENTS: (some designs only)
If your design includes a wood cut shape, word or element:
Paint it with a make-up wedge, using as little paint as possible.
Dry.
repeat if necessary.
Attach it to your wood sign using wood glue, super glue or craft glue. Some wood elements are self-adhesive. You won't need glue for those. You can just peel away the sticker layer and press the shape straight onto your board.

5. VARNISH: (optional)
If you are using your sign as a tray, want it to hang outside or in a steamy bathroom, you may need to varnish it to protect it.
For more inspiration on your round sign see below or check what others have painted at some of the past Three & Me events on Instagram or Facebook.


QUESTIONS? E-mail claire@threeand.me anytime!

Enjoy your beautiful new sign! Please share photos on Facebook and Instagram with tag #threeandme #roundsigns #wood #woodsigns #diyartkit #diyhomedecor #artproject #diy #stencil


Comments